- Published on
A Concise Guide to iOS Localization
Overview
iOS localization mainly involves the following areas:
- Localization of properties in InfoPlist.
- Storyboard/xib localization.
- String localization.
- Image localization.
- How localization works under the hood.
- Related scripts.
Preparation for Localization
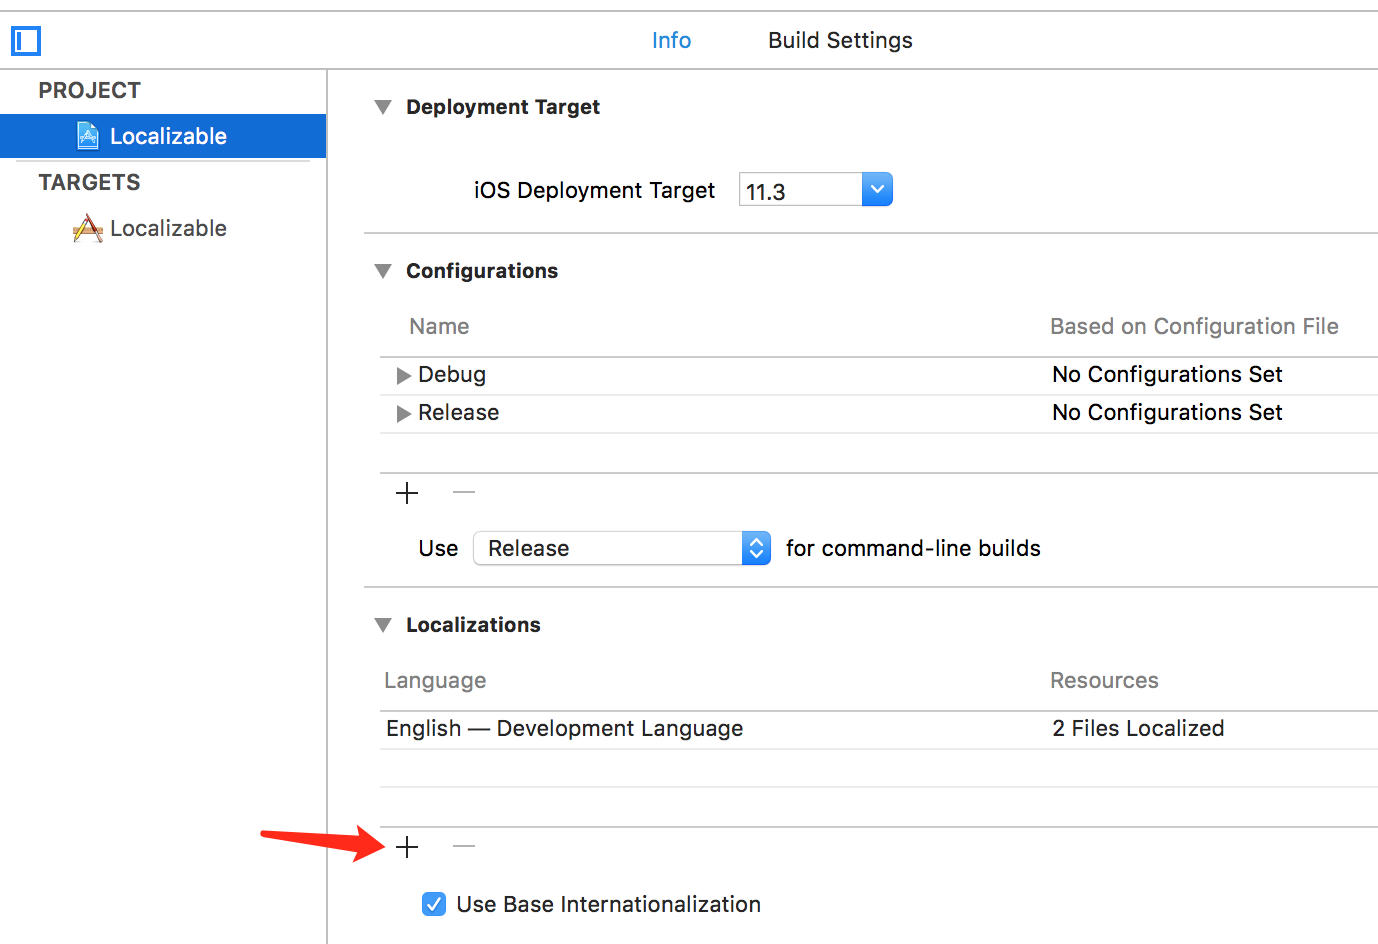
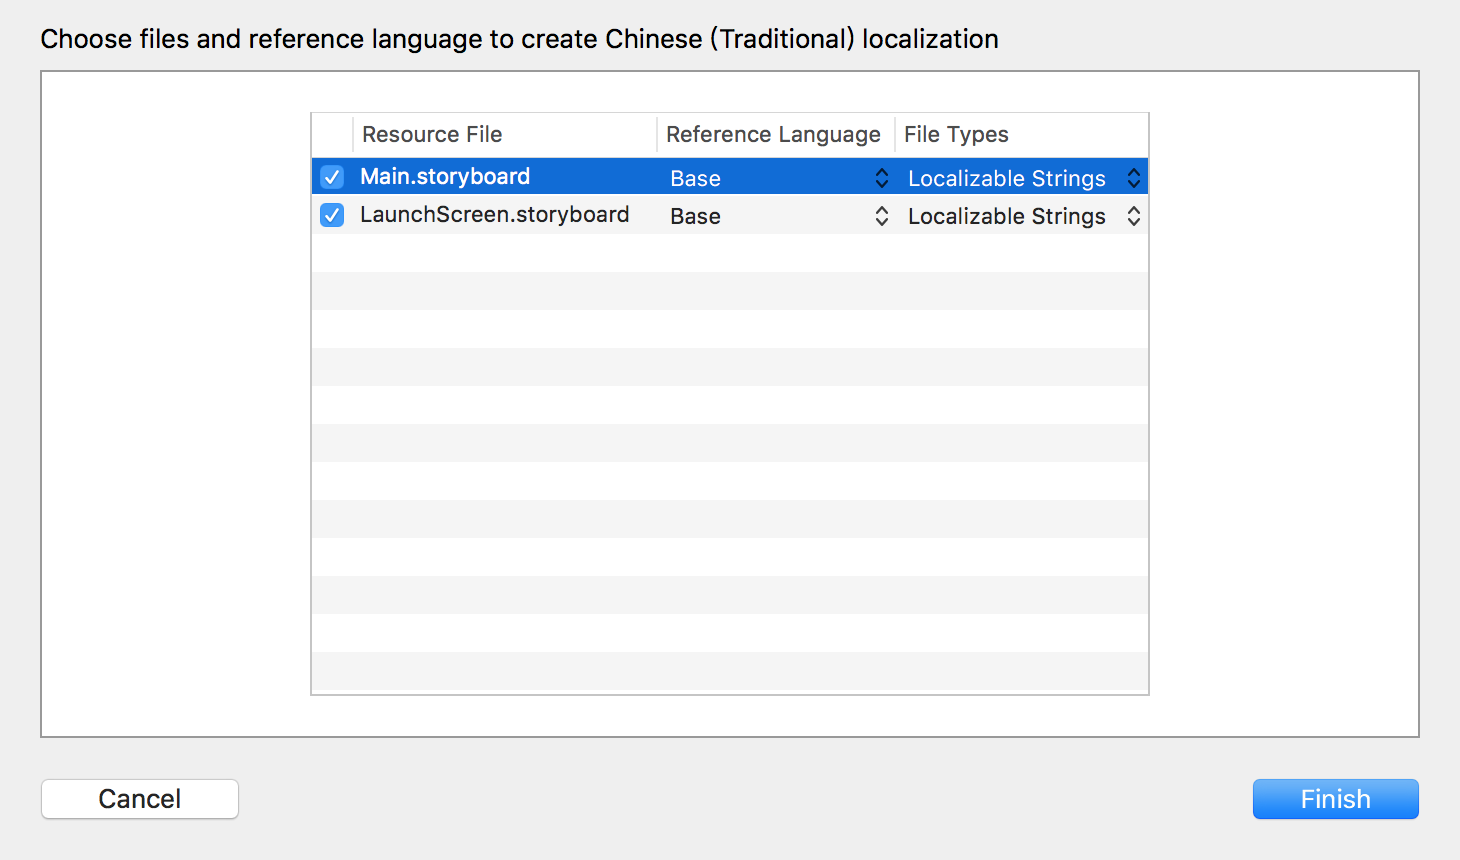
Localizing InfoPlist Properties
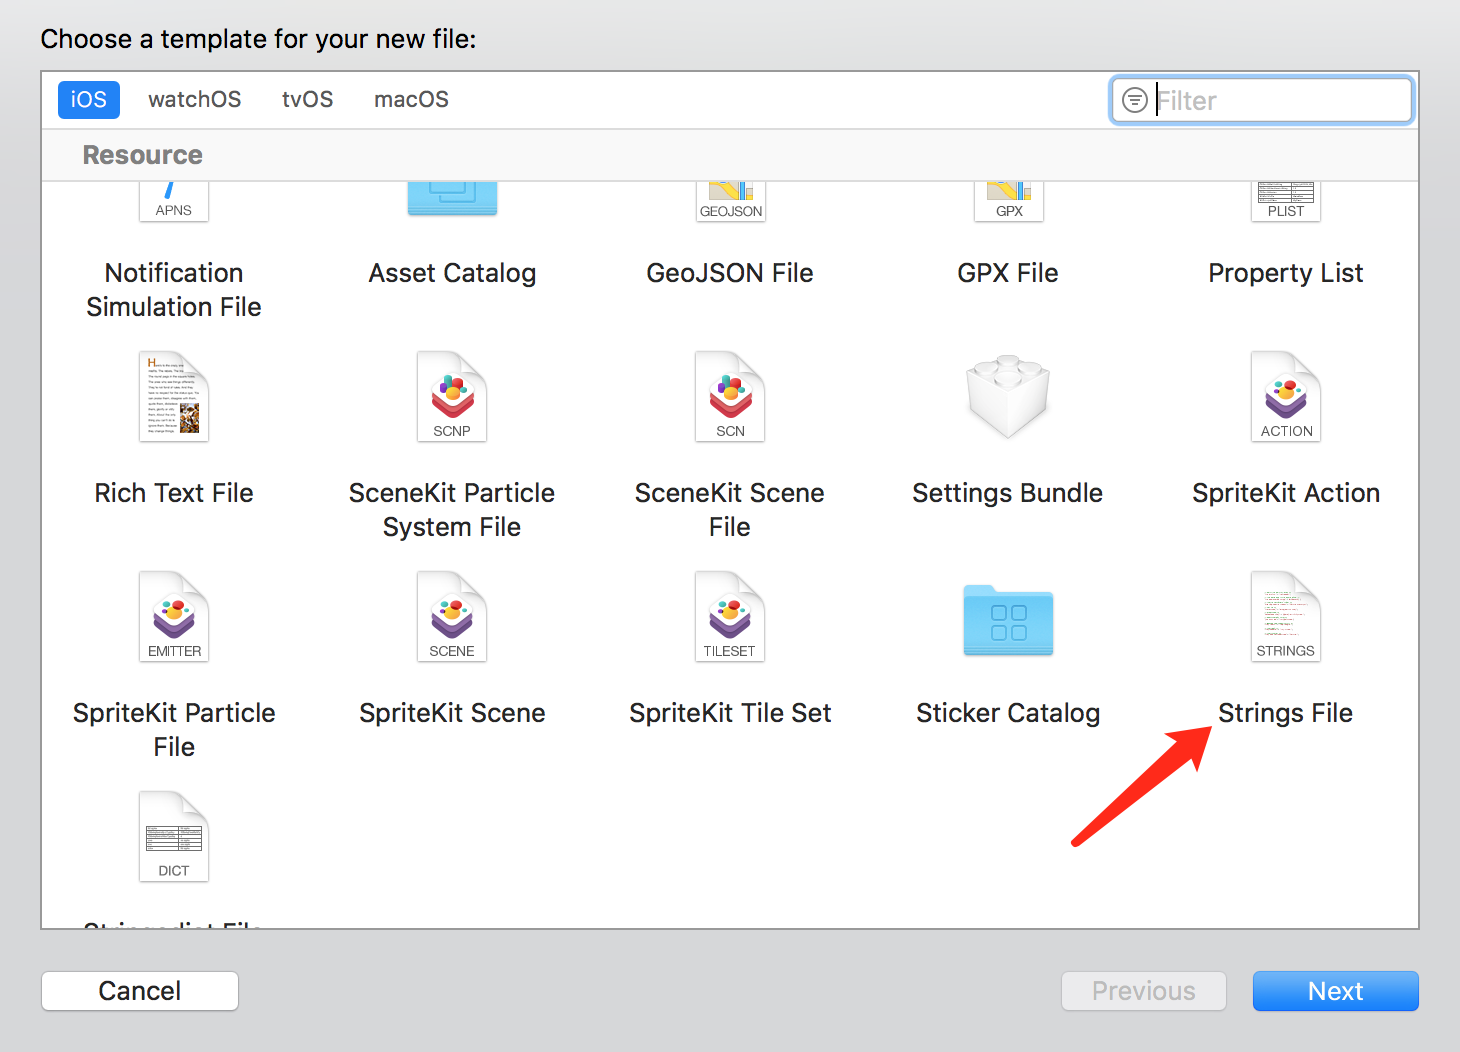
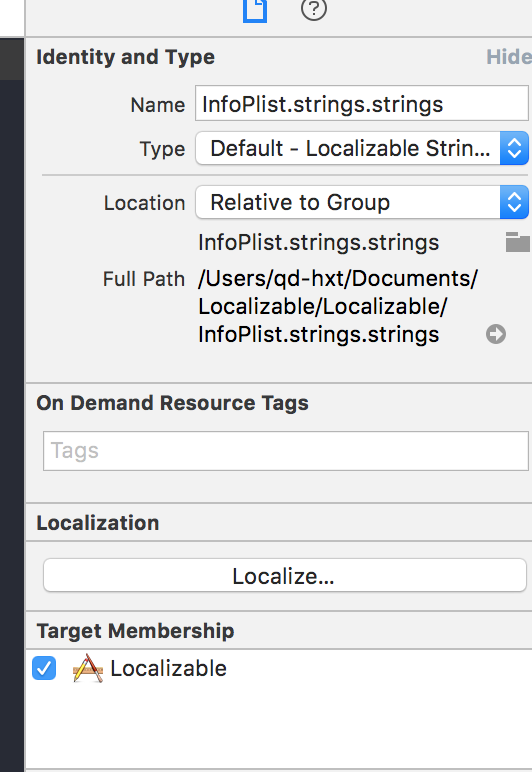
Create a new String File and name it InfoPlist.strings. These resources can of course be placed in a specific directory for easier management, such as a Resources directory.
Then configure the localization settings.
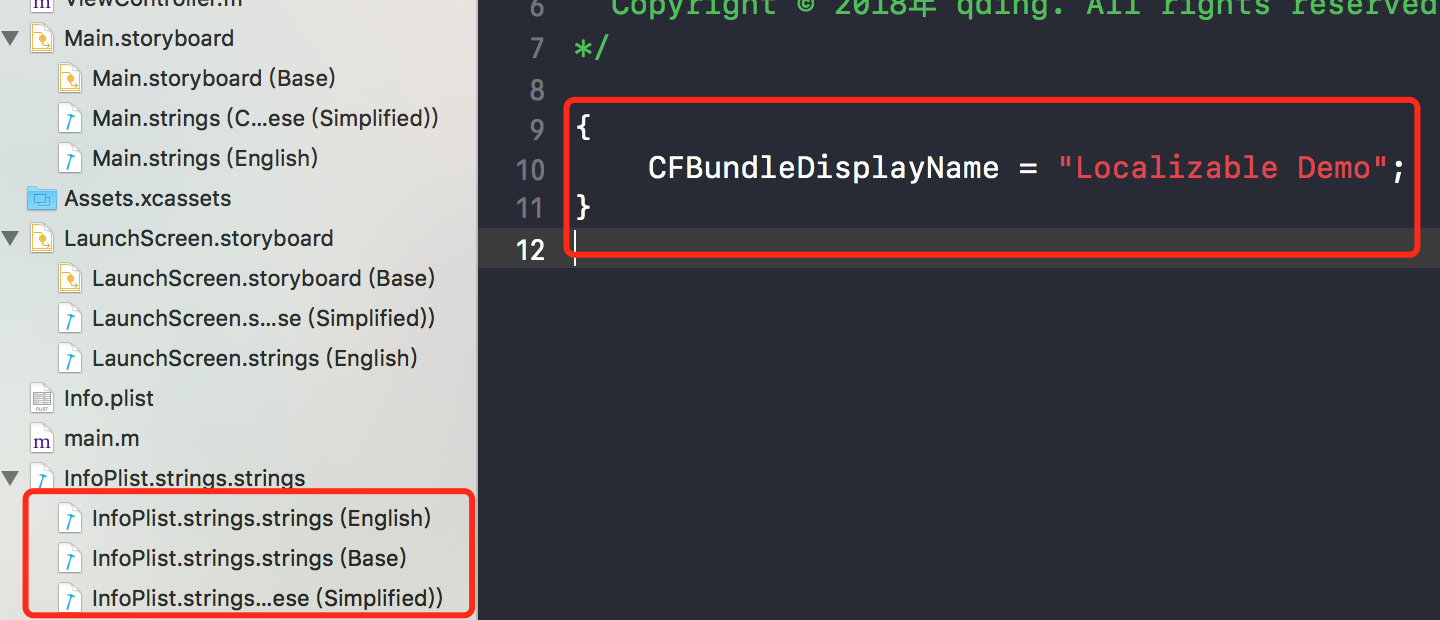
CFBundleDisplayName is a property in the InfoPlist file used to display the app's name. Other properties are configured the same way. Pay attention to the hierarchy.
Storyboard/xib Localization
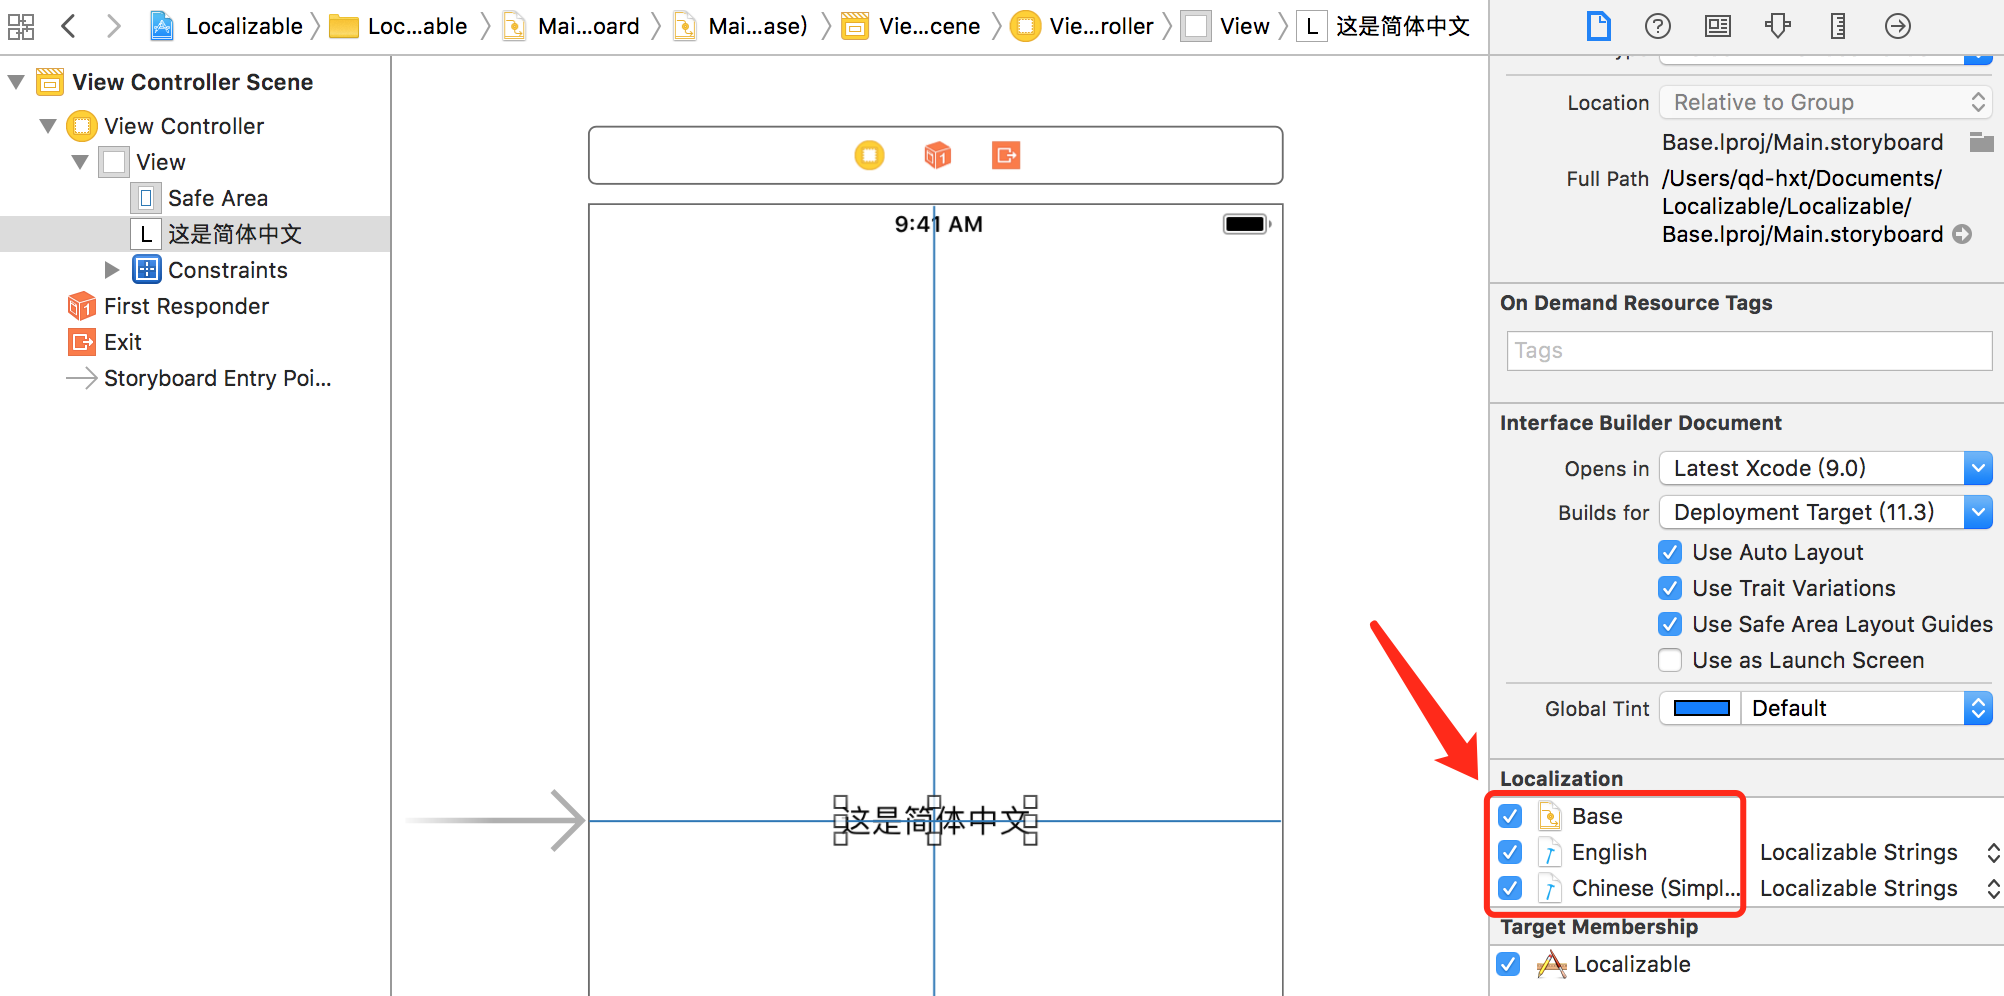
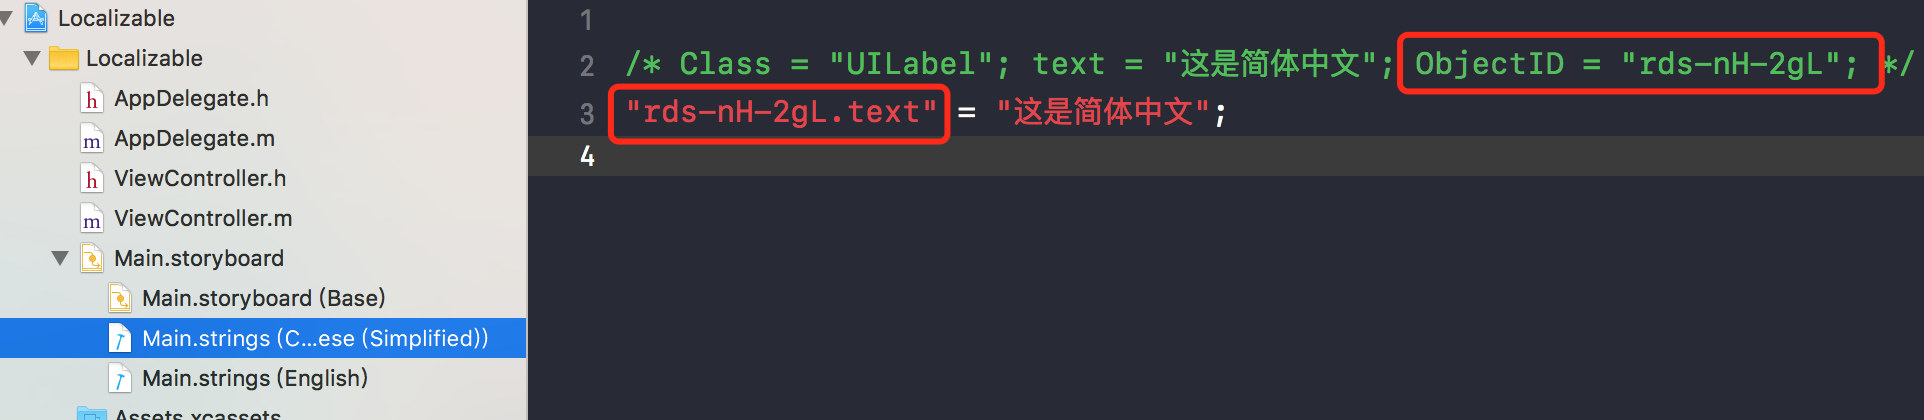
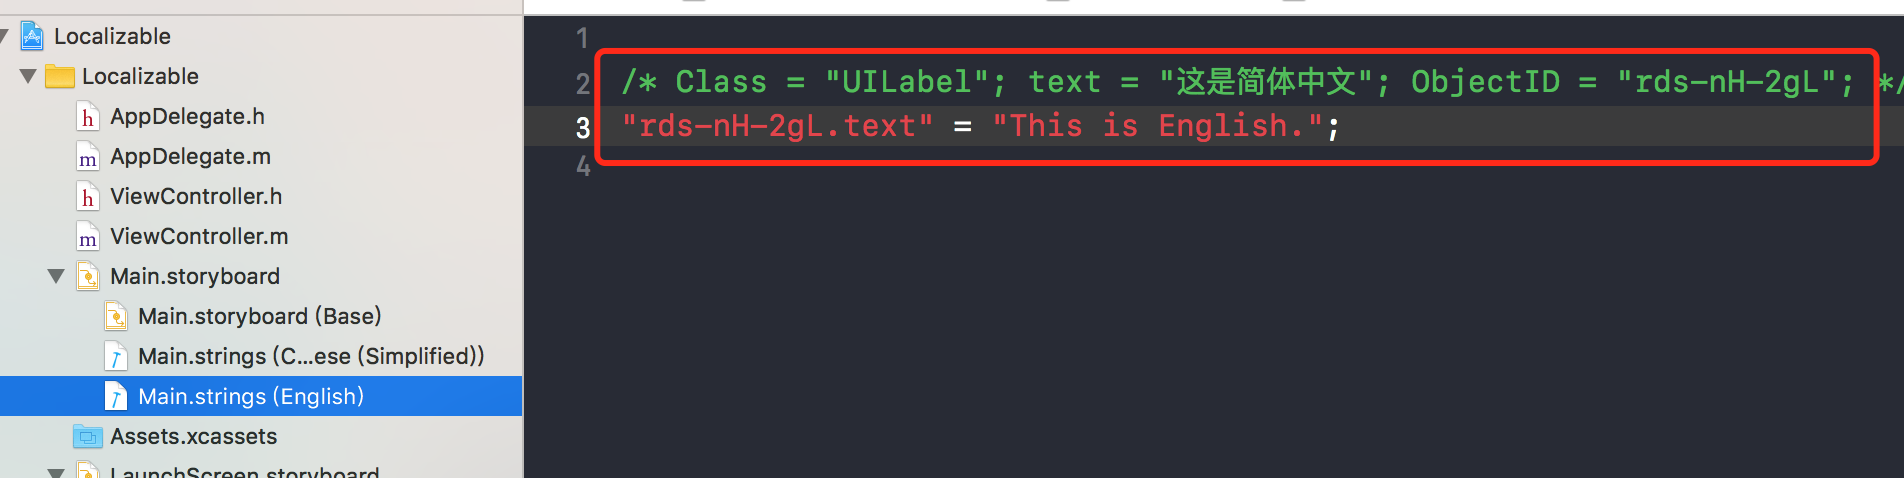
Note: you must select a specific control in the storyboard before checking the localization option. Otherwise, the new localization file will not contain the control's ObjectID.
Then make modifications in the Main.strings-related files.
String Localization
This is the most important part.
For unified management, localization content is not placed in storyboards or xib files, but set in code.
Create a new String File and name it Localizable.strings.
Check the localization configuration on the right side.

Set the following in each of the three configurations:
// Localizable.strings(English)
"本地化文本" = "Localizable Text";
// Localizable.strings(Simplified)
"本地化文本" = "本地化文本";
// Localizable.strings(Base)
"本地化文本" = "本地化文本";
Once done, you can test in code:
NSString *string = NSLocalizedString(@"本地化文本", nil);
NSLog(@"%@", string);
The name of the localization file can be customized as long as it matches when loading, and the extension must be .strings. For example, Language.strings.
When loading, add the following code and use LocalizableBundle(@"xxxx") to load.
#define LocalizableBundle [NSBundle mainBundle]

#define LocalizedString(key) \
NSLocalizedStringFromTableInBundle(key, @"Language", LocalizableBundle, nil)
The usage code then becomes:
NSString *string = LocalizedString(@"本地化文本");
NSLog(@"%@", string);
Image Localization
The principle is to load different image name strings based on different localization configurations, which are then used to initialize different images.
Create an ImageLocalizable.strings file and localize it.
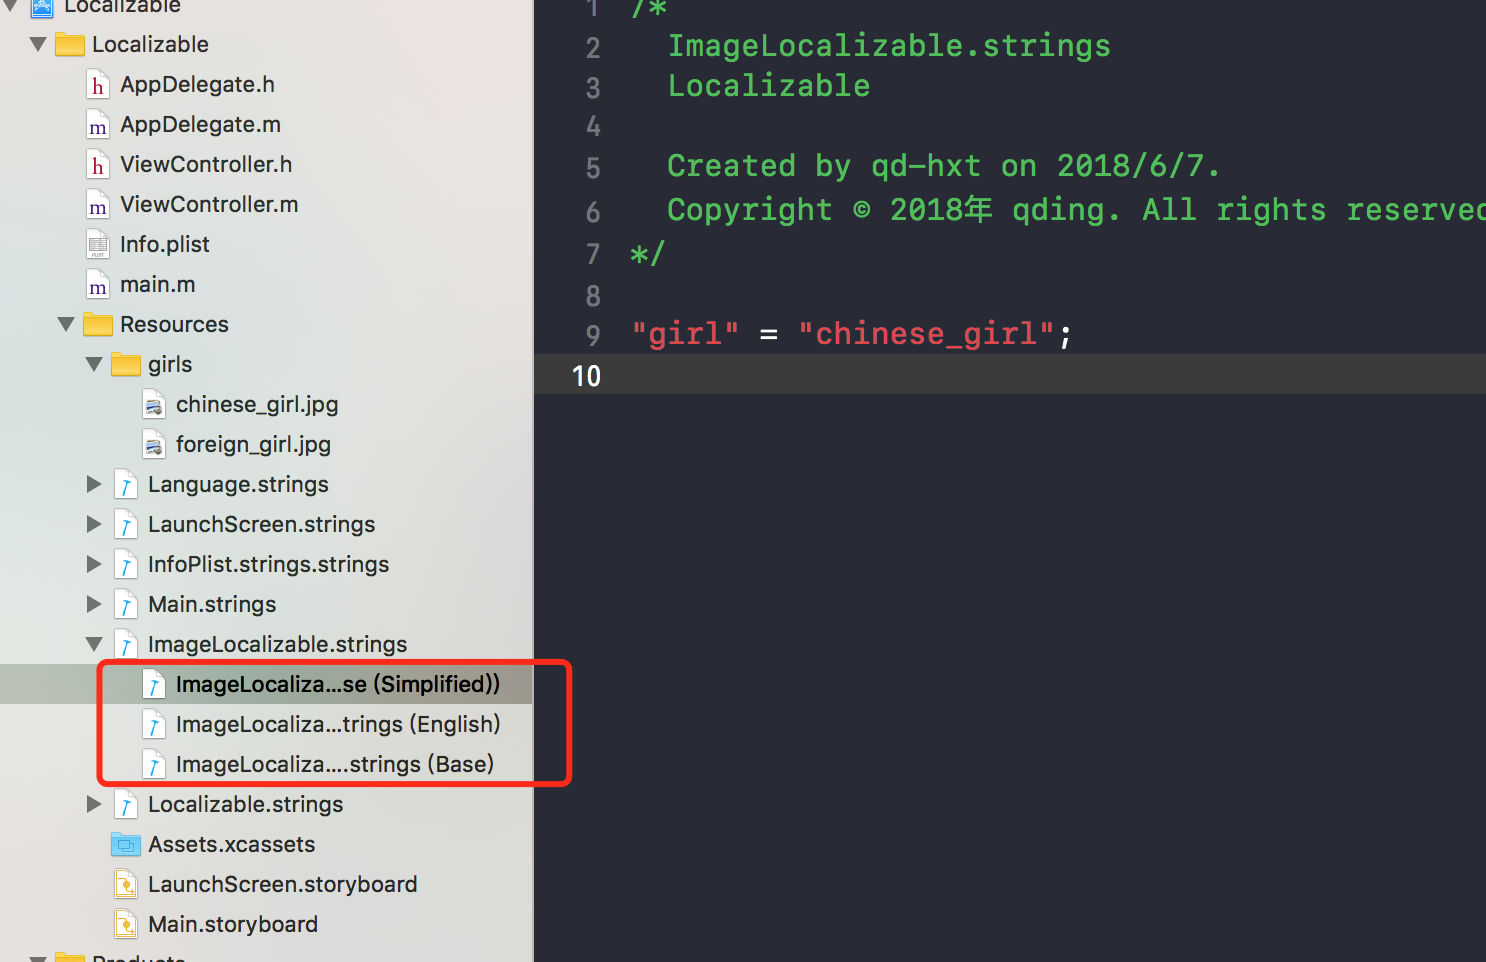
Building on the above macro definitions, add another macro:
#define LocalizedImage(key) \
NSLocalizedStringFromTableInBundle(key, @"ImageLocalizable", LocalizableBundle, nil)
To load in code:
NSString *path = [[NSBundle mainBundle] pathForResource:LocalizedImage(@"girl") ofType:@"jpg"];
self.girlImageView.contentMode = UIViewContentModeScaleAspectFill;
self.girlImageView.image = [UIImage imageWithContentsOfFile:path];
How Localization Works
When the app launches, it first reads the content stored under the key AppleLanguages in NSUserDefaults to get an object. By analyzing the type of this object, you can determine the current localization environment. When there is only one localization environment, the value is actually an NSString.
Code:
id localizables = [[NSUserDefaults standardUserDefaults] valueForKey:@"AppleLanguages"];
NSLog(@"Localization: %@", localizables);
NSString *currentLocalizable = nil;
if ([localizables isKindOfClass:[NSString class]]) {
    currentLocalizable = (NSString *)localizables;
} else if ([localizables isKindOfClass:[NSArray class]]) {
    currentLocalizable = ((NSArray *)localizables).firstObject;
}
NSLog(@"Current localization: %@", currentLocalizable);
If it is an NSArray, the contents of that NSArray correspond to the "Preferred Language Order" in the phone's settings.
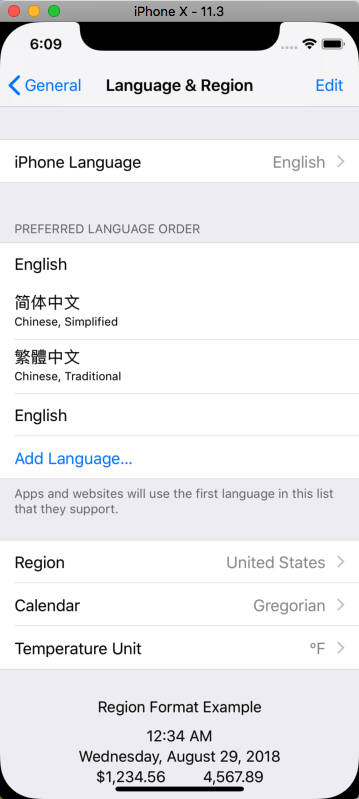
The first entry is the current language environment.
Based on this, the app's localization environment can be changed.
[[NSUserDefaults standardUserDefaults] setObject:@[@"zh-Hans"] forKey:@"AppleLanguages"];
[[NSUserDefaults standardUserDefaults] synchronize];
This takes effect only after restarting the app.
Furthermore, you can go a step further and modify the method for loading localization files, combined with the above method for changing the localization environment, to dynamically load localization resources. The code is as follows:
id dynamicLocalizables = [[NSUserDefaults standardUserDefaults] valueForKey:@"AppleLanguages"];
NSString *currentDynamicLocalizable = nil;
if ([dynamicLocalizables isKindOfClass:[NSString class]]) {
    currentDynamicLocalizable = (NSString *)dynamicLocalizables;
} else if ([dynamicLocalizables isKindOfClass:[NSArray class]]) {
    currentDynamicLocalizable = ((NSArray *)dynamicLocalizables).firstObject;
}
path = [[NSBundle mainBundle] pathForResource:currentDynamicLocalizable ofType:@"lproj"];
NSLog(@"%@", [[NSBundle bundleWithPath:path] localizedStringForKey:@"本地化文本" value:@"" table:nil]);
This is just experimental; if the project has similar requirements, it can be further encapsulated into a calling style similar to NSLocalizedString.
Related Scripts
Since the goal here is merely to prepare for future localization, the approach is fairly straightforward: first, require that all text and image names in the project be loaded using LocalizedString and LocalizedImage. Of course, if there are no corresponding localization resources, the parameter will be used as the default value. Then use a script to extract all the parameters of LocalizedString and LocalizedImage from the code and fill them as key-value pairs into each localization resource file.
For example, if the code uses LocalizedString(@"Test"), the script will add "Test"="Test"; to the Language.strings files for all language environments.
This way, if localization is needed in the future, you only need to modify the values in each localization resource file. Furthermore, you can implement a script that outputs these to an Excel file, lets the product team add the corresponding localization translations, and then uses another script to output the final localization resource files.
Other Notes
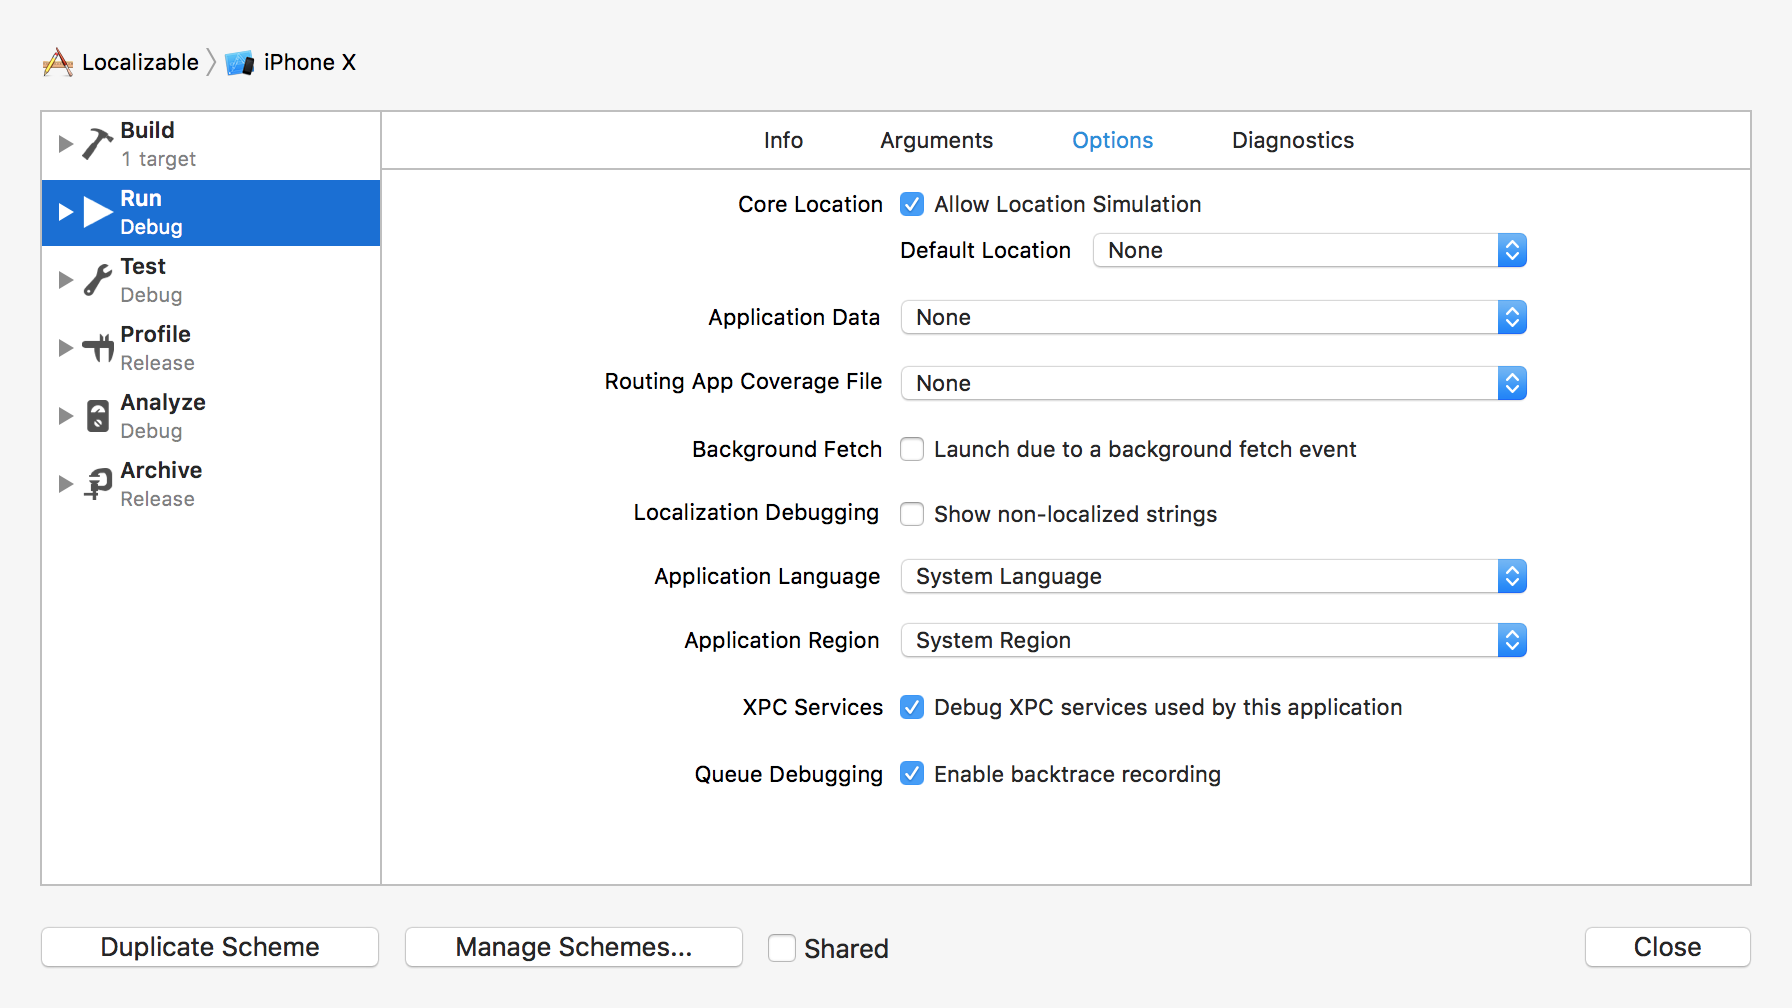
Debugging tip: You can change the Application Language in Edit Scheme to the desired language, so you don't need to change it in the settings of the simulator or a real device.