- Published on
Configuring Multiple Targets in an iOS Project
Background
First, a quick rant: the company has recently taken on several outsourced projects with similar functionality, and I've been grinding through them day and night, basically turning into a contractor. The bonuses are decent, but this pace isn't sustainable.
Approach
Since the projects share similar functionality, the goal is to maximize code reuse. The most practical solution I've come up with is using multiple targets — compiling different projects from the same codebase using multiple targets. This should be sufficient for requirements that only involve swapping out the UI theme.
Steps
-
Assume you already have a project called
MultipleTargetTest. There will be a default target namedMultipleTargetTest. The basic setup and configuration for this target is assumed to be done. -
Right-click the target
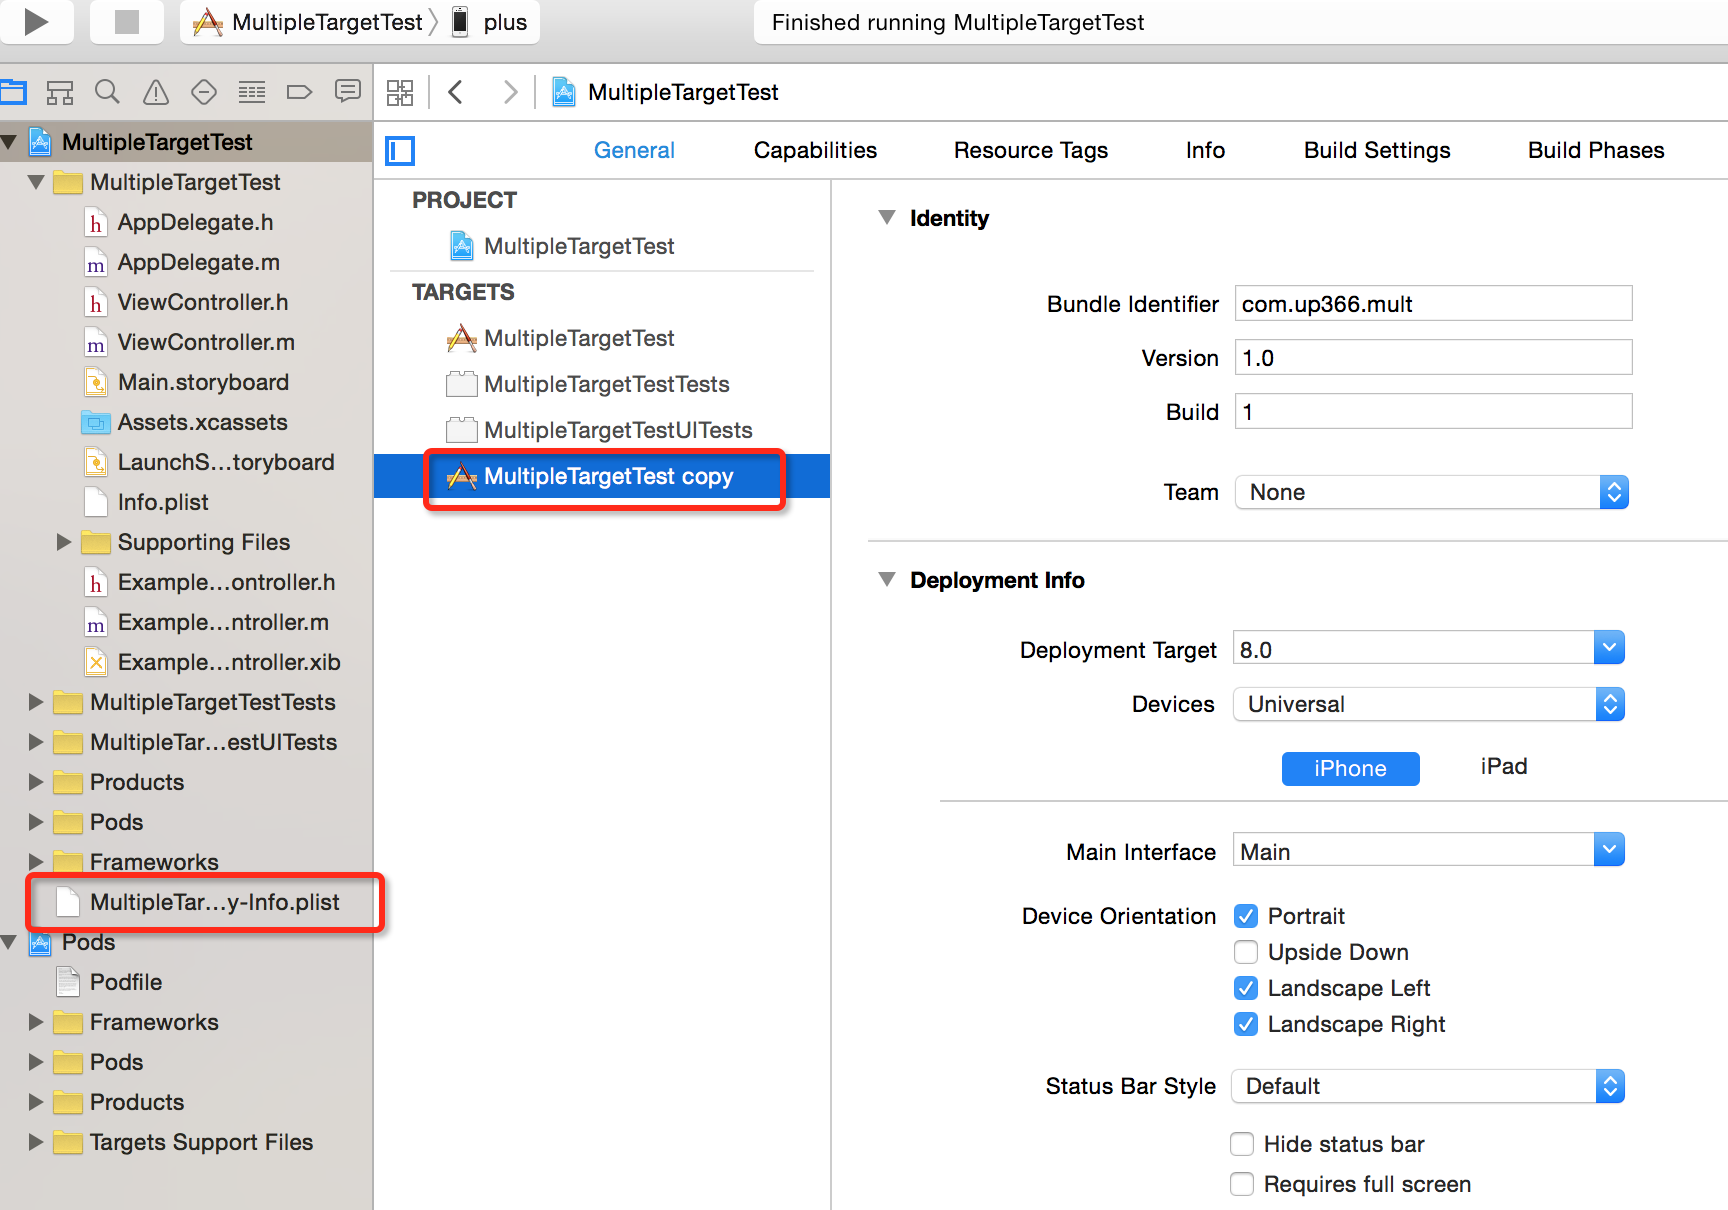
MultipleTargetTestand selectDuplicate. This creates a new target namedMultipleTargetTest-copyand a corresponding plist fileMultipleTargetTest-copy-info.plist.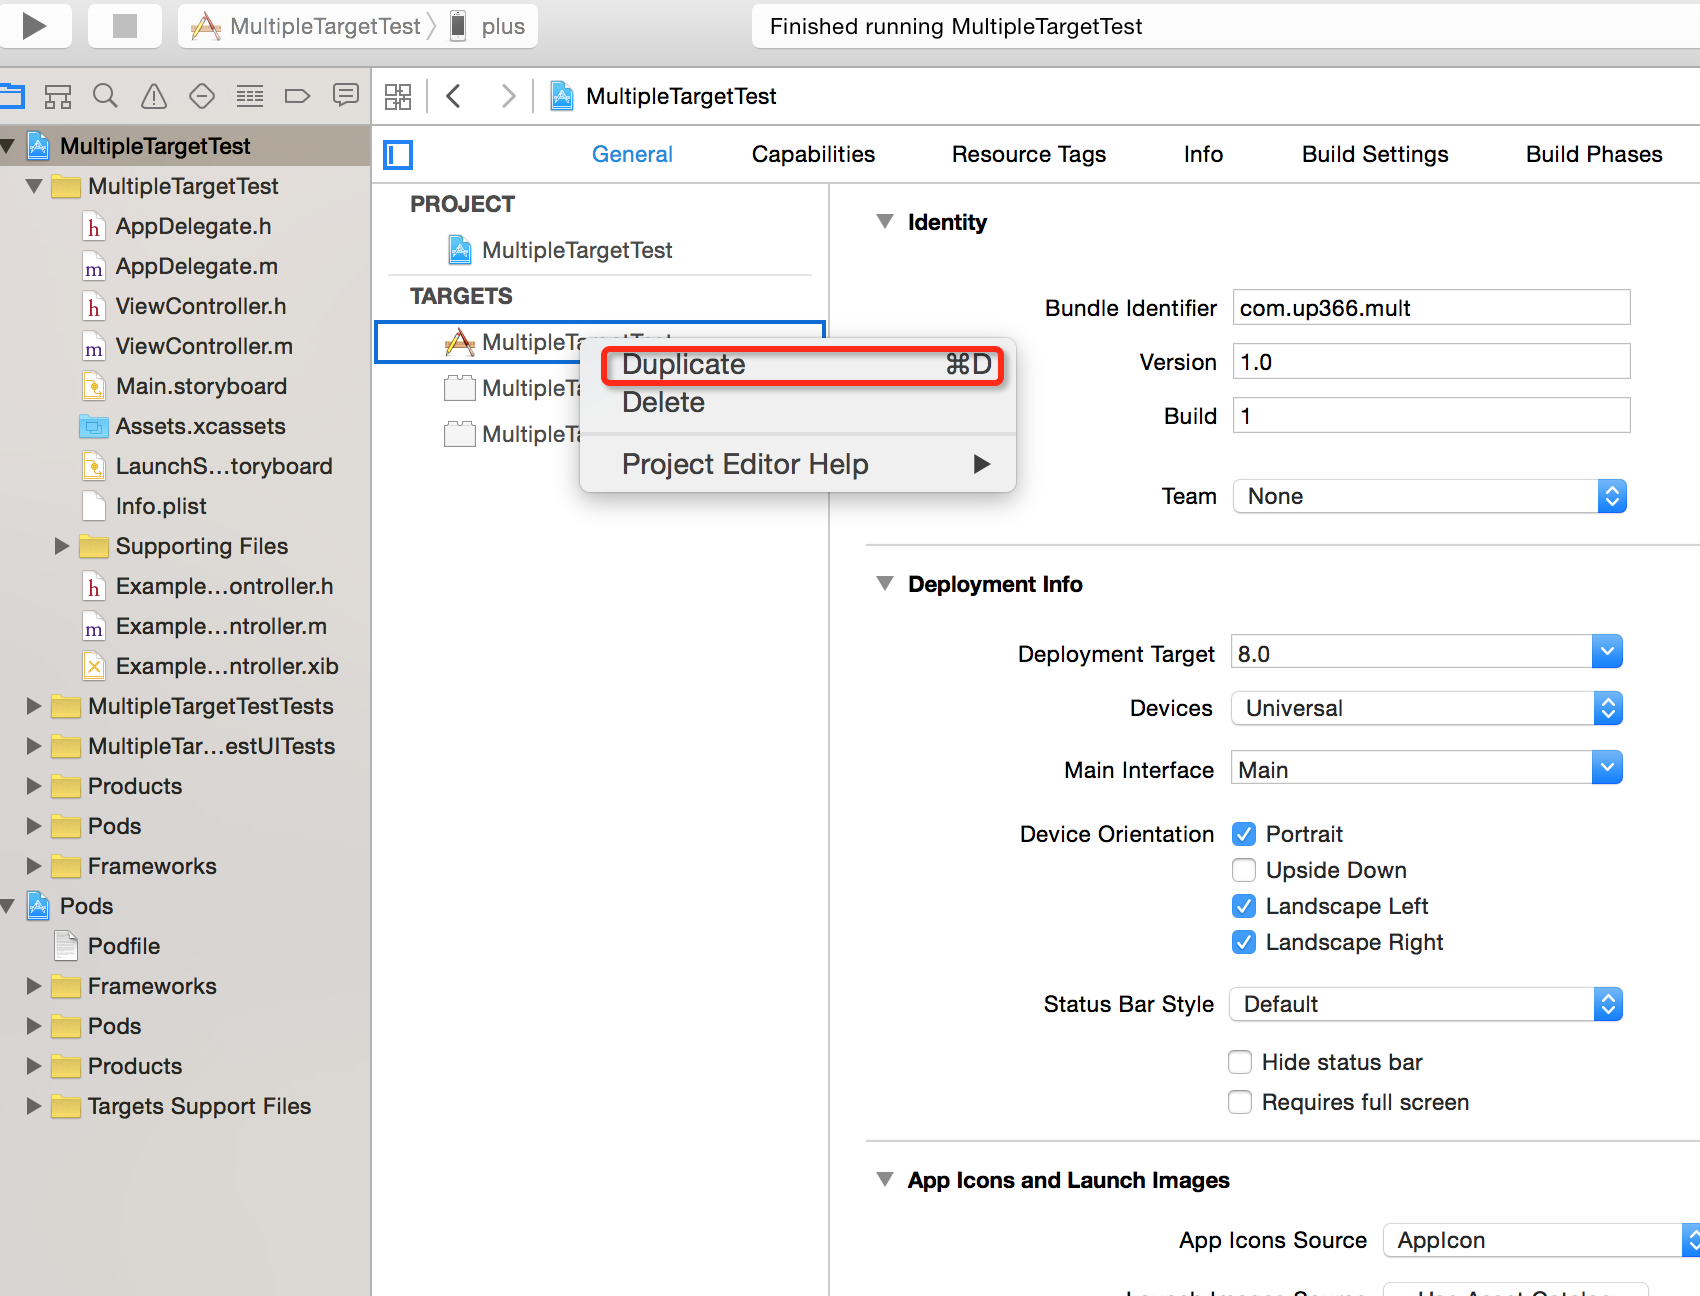
-
Rename both the target and the plist file, then use
Choose Info.plist File...to link them, as shown.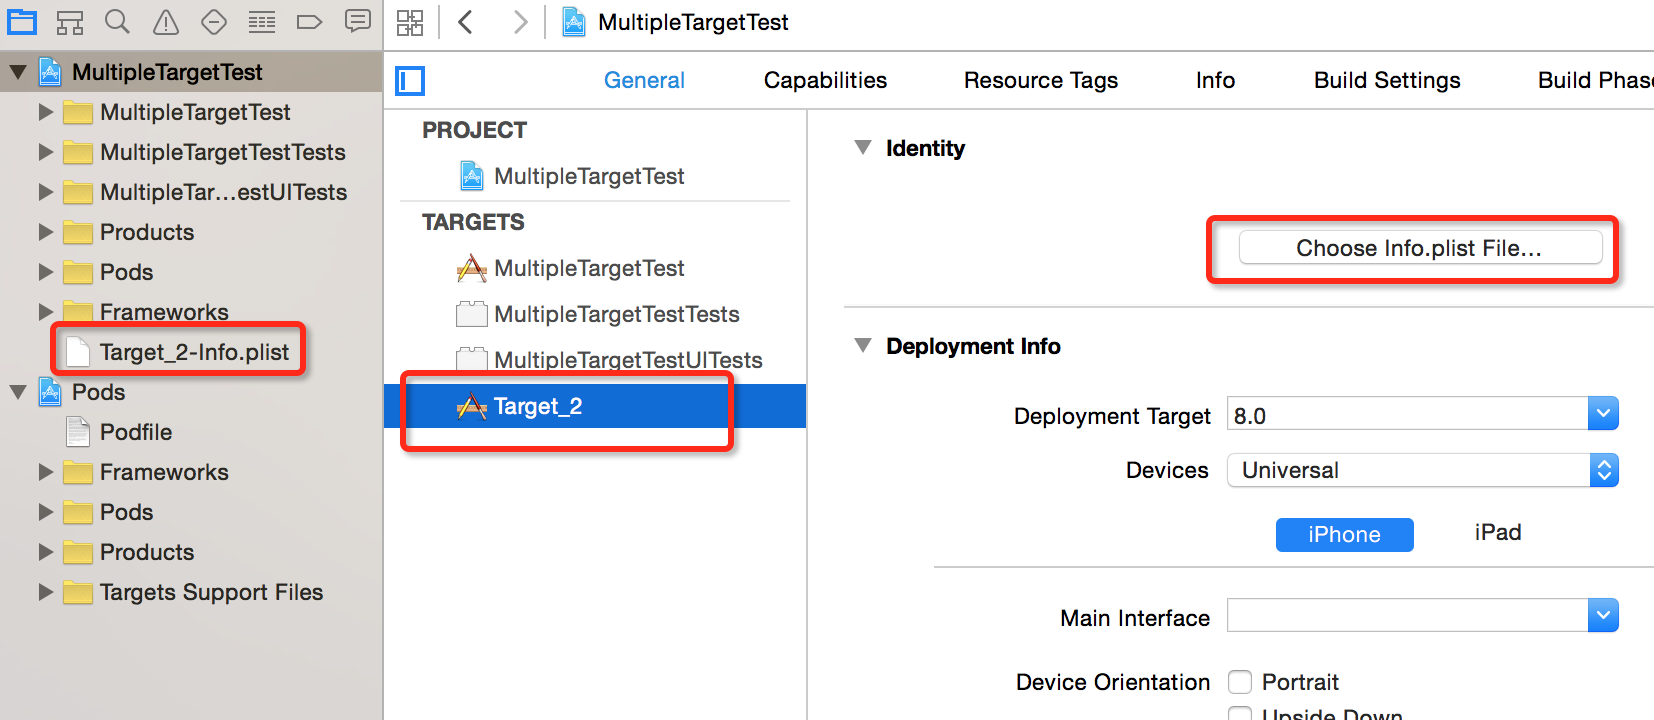
-
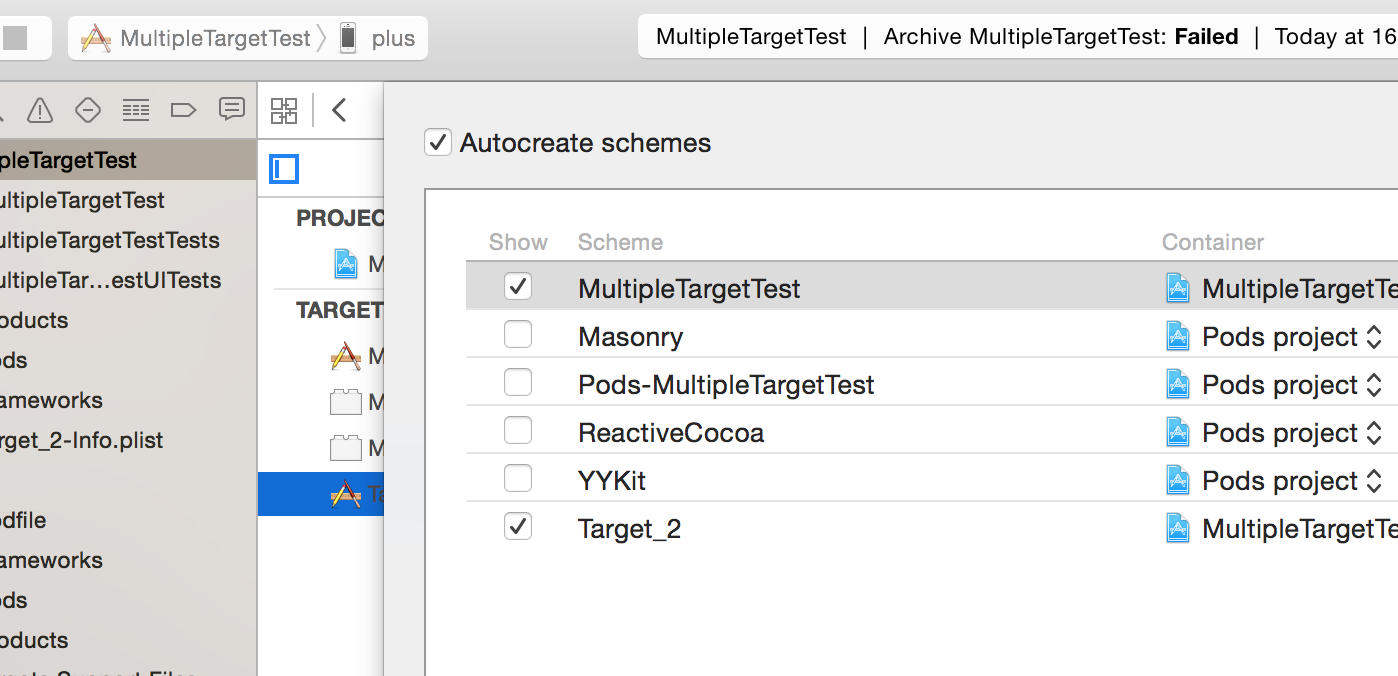
Update the scheme name in
Manage Schemes.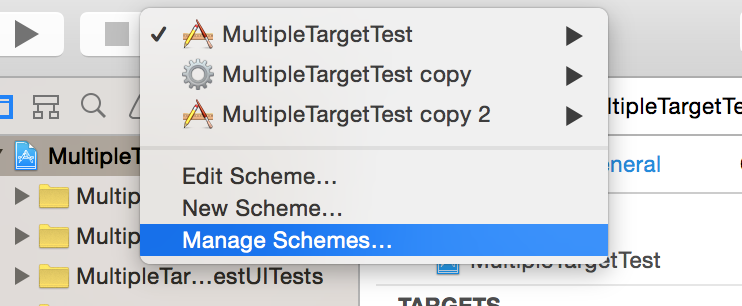
-
Update the
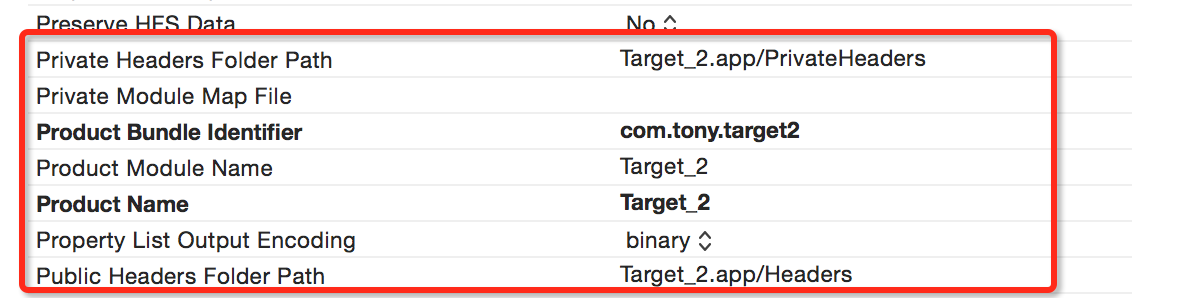
Bundle IdentifierforTarget_2. Also verify that the corresponding settings inBuild Settingsare consistent.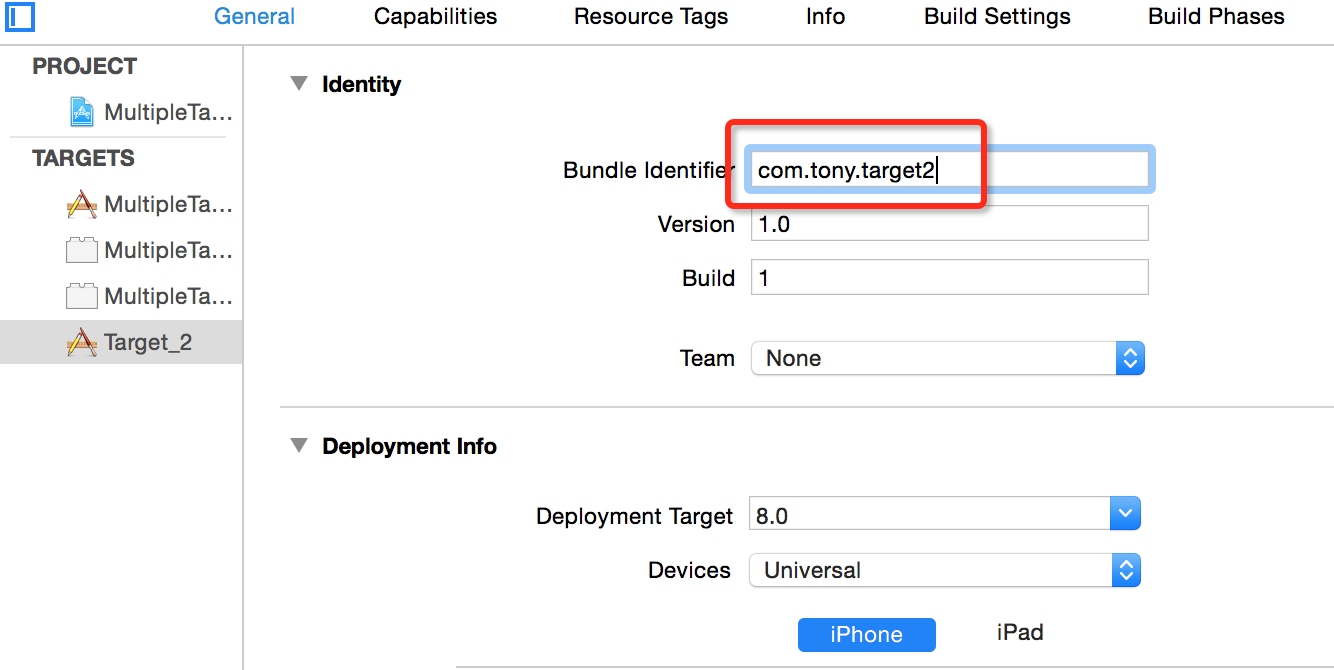
-
In
Build Settings, search forOther C Flagsand add-DMULTIPLE_TARGETS_TARGET2. You can then use this macro in code for conditional compilation. See the code example below.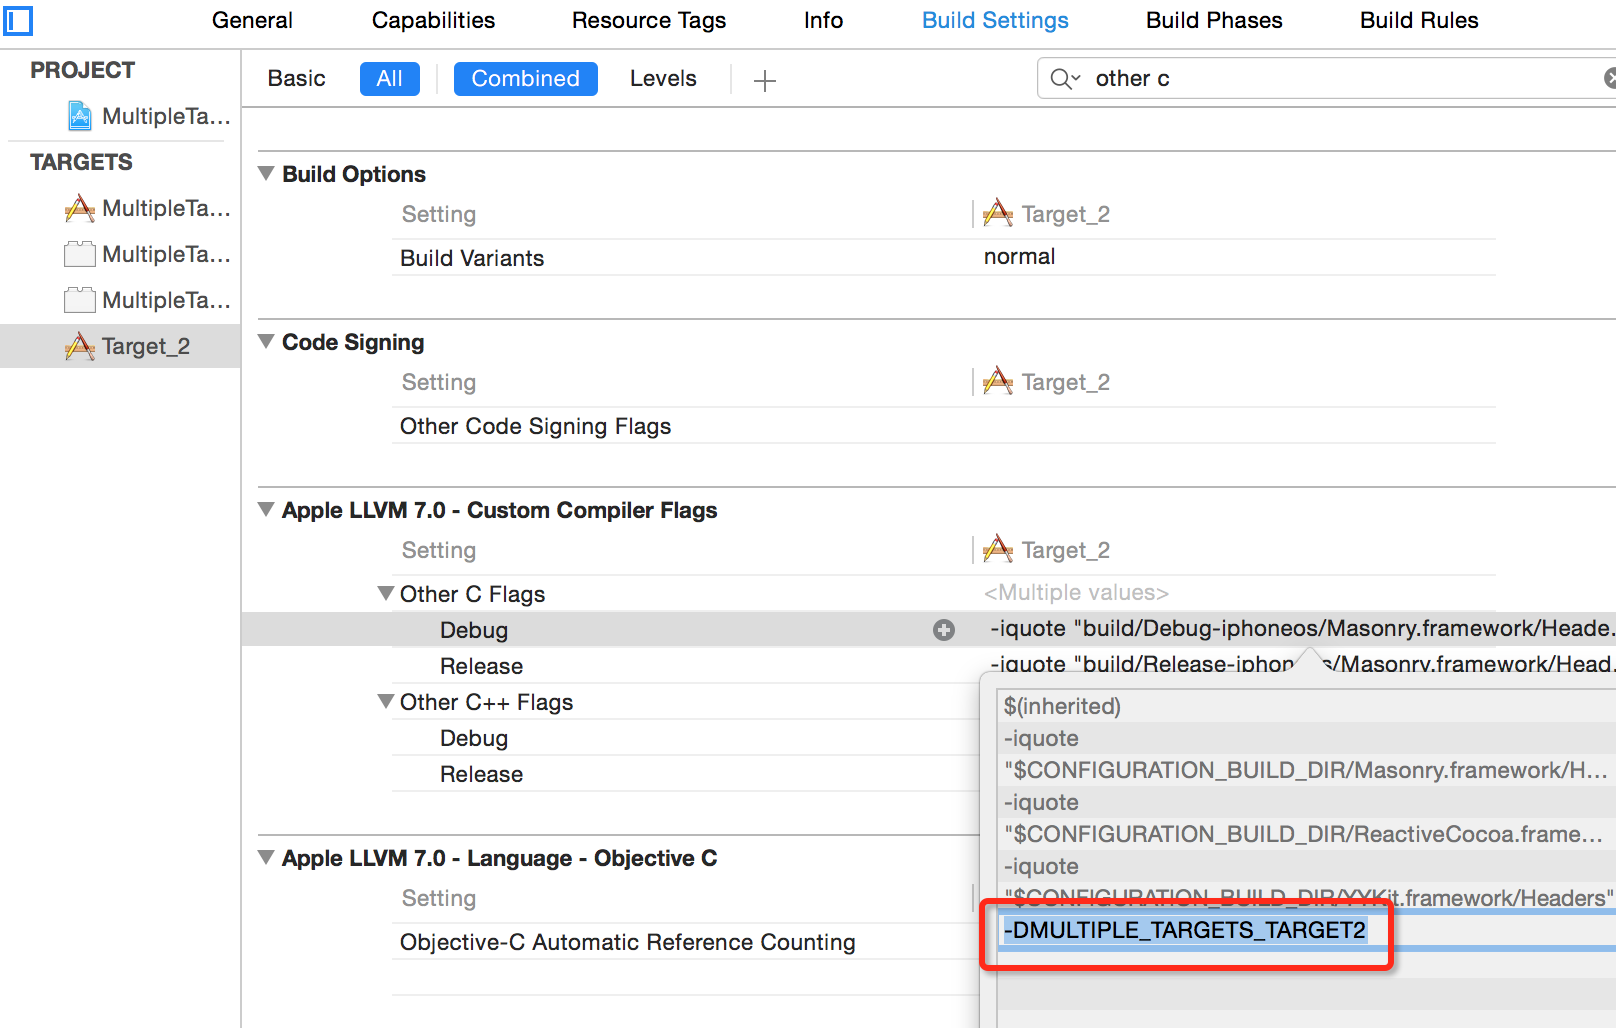
-
Modify
Target_2-Info.plistas needed.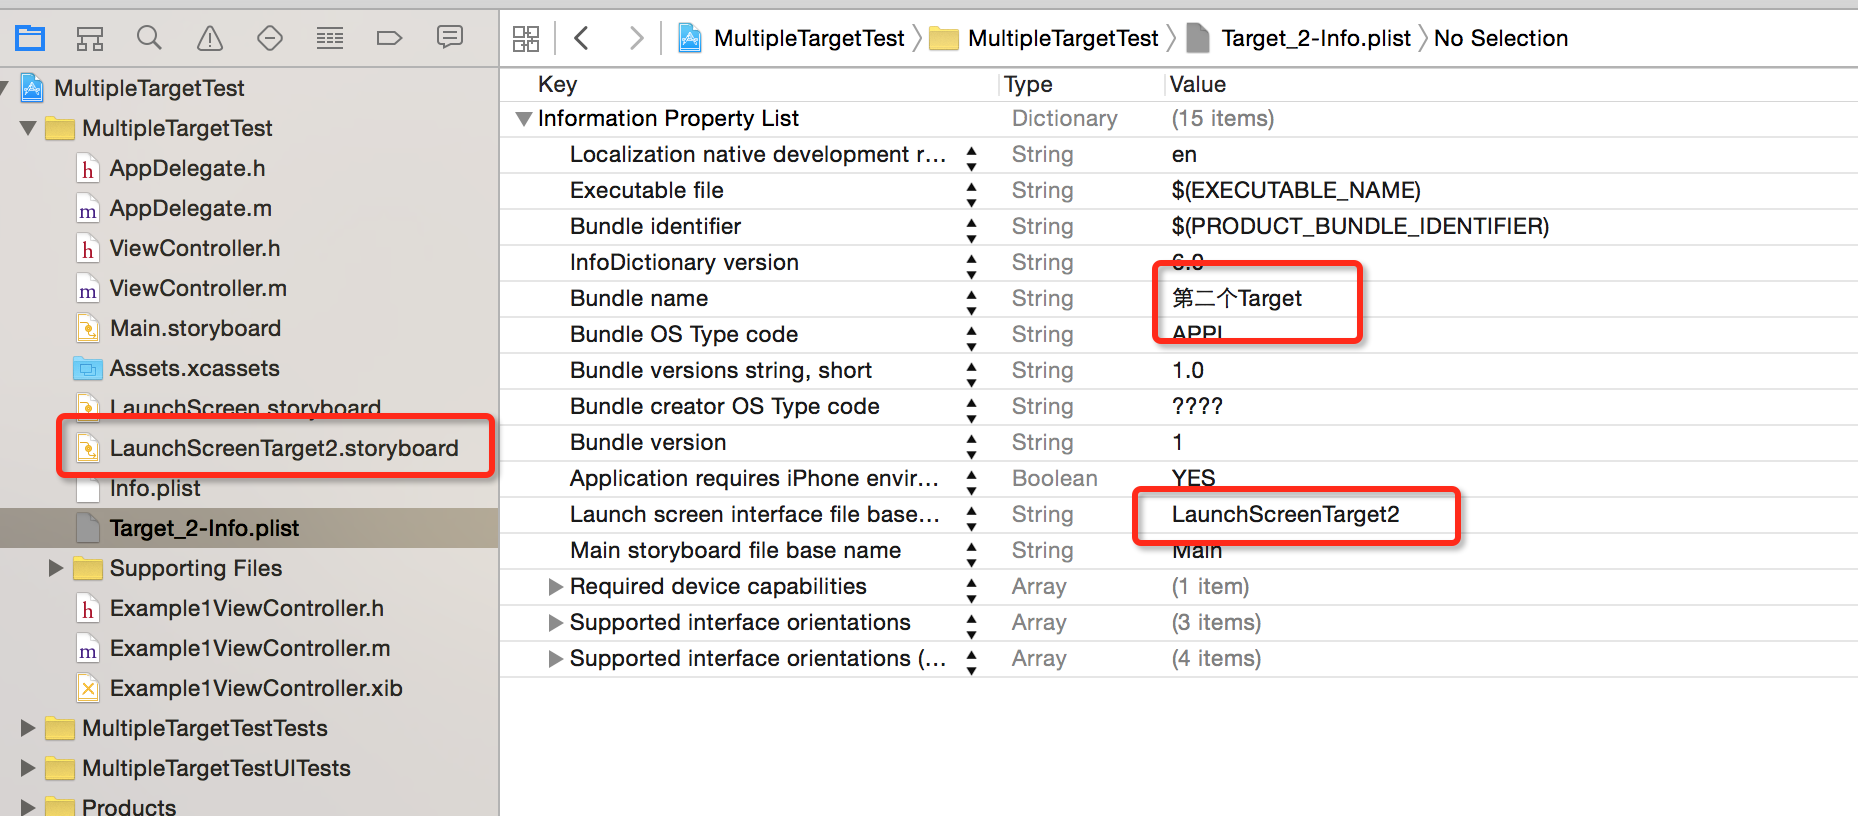 Note:
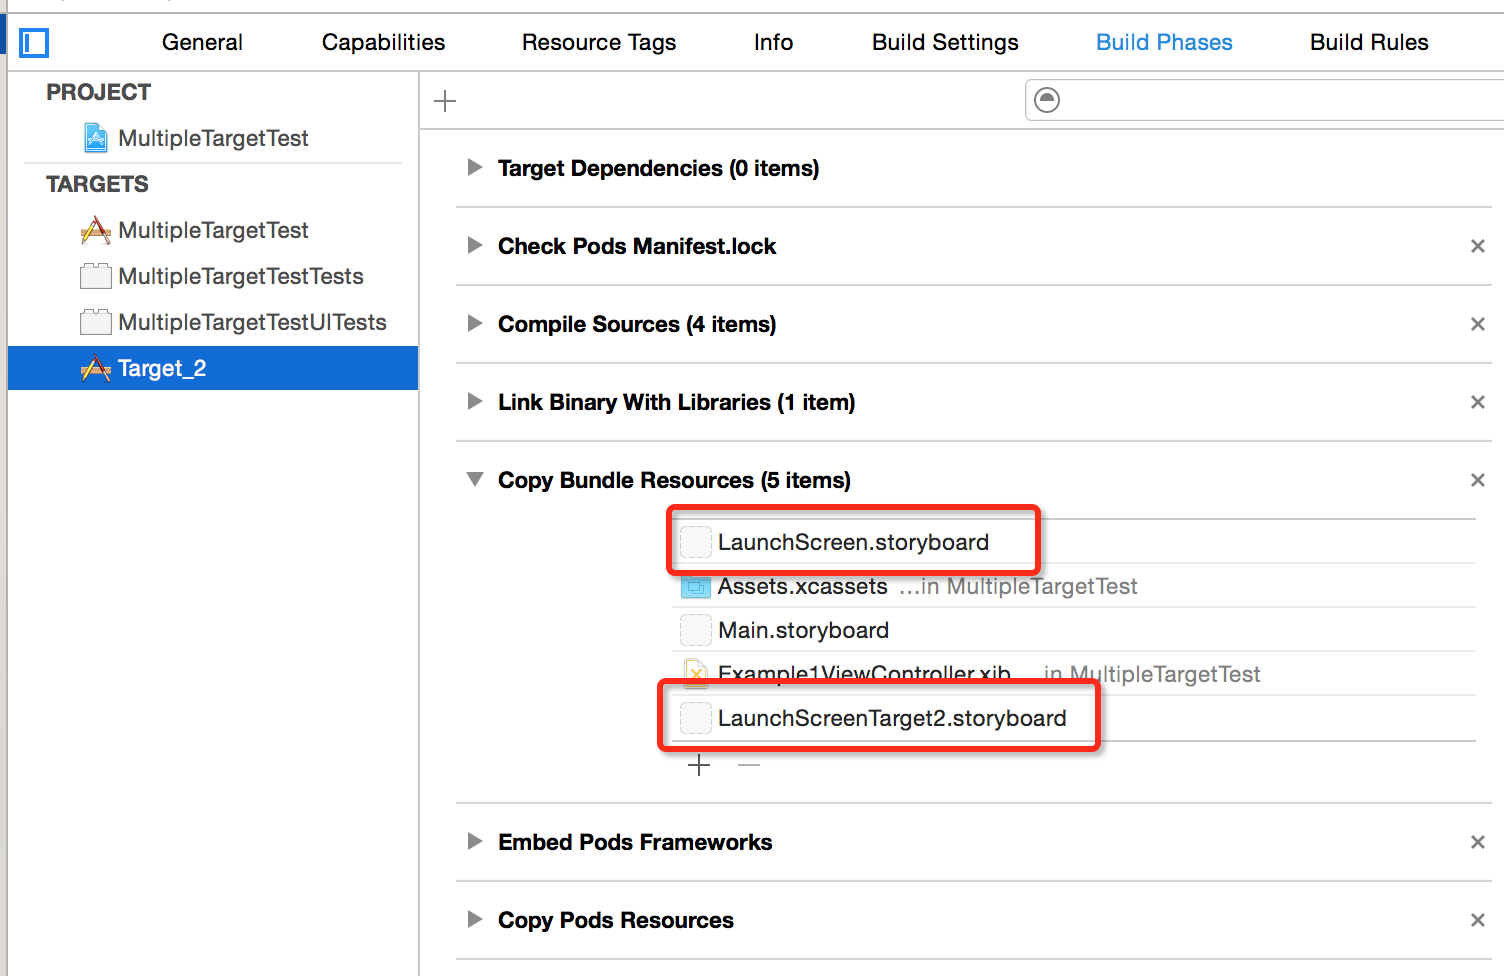
The newly added
LaunchScreenTarget2.storyboardmust be added underBuild Phases, and the unusedLaunchScreen.storyboardshould ideally be removed as well.
-
You can now modify
LaunchScreenTarget2.storyboardand debug by selecting different targets. -
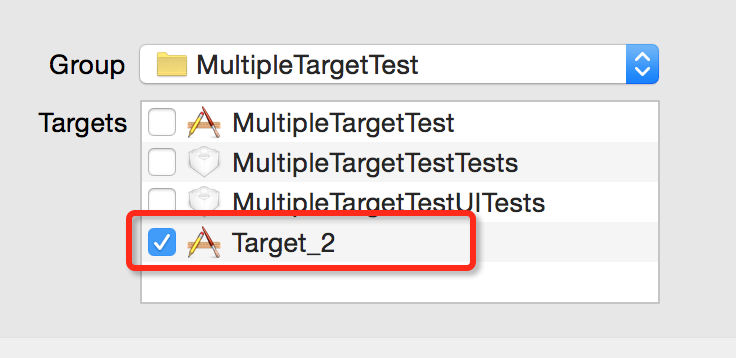
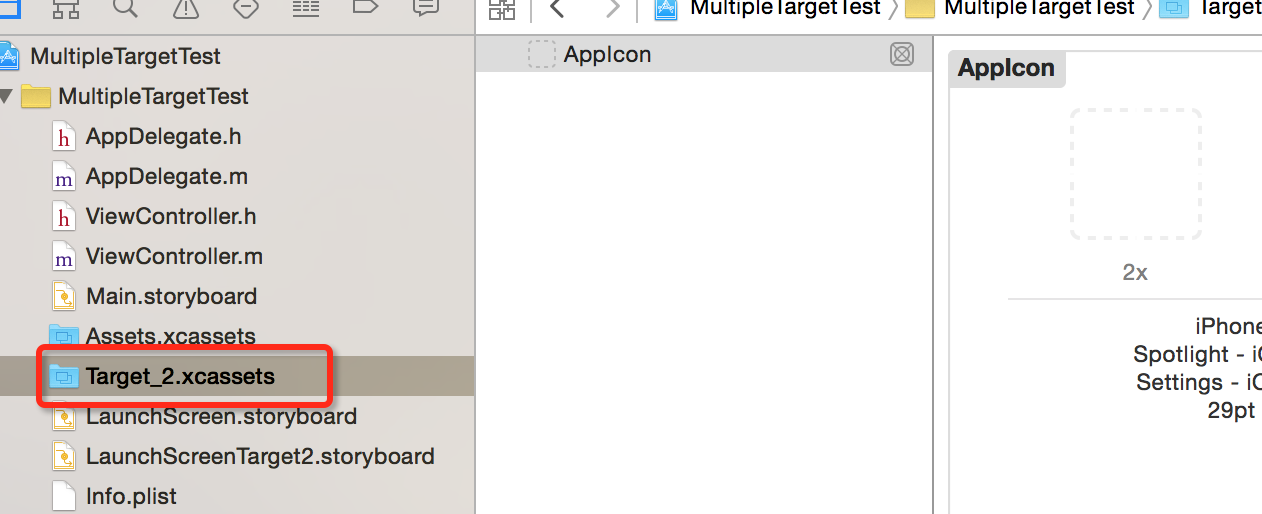
For app icons and image assets, create a new asset catalog. Simply copy the JSON file over. It also needs to be configured in
Build Phases. The recommended approach is to keep shared assets inAssets, and have each target include its own separate asset catalog.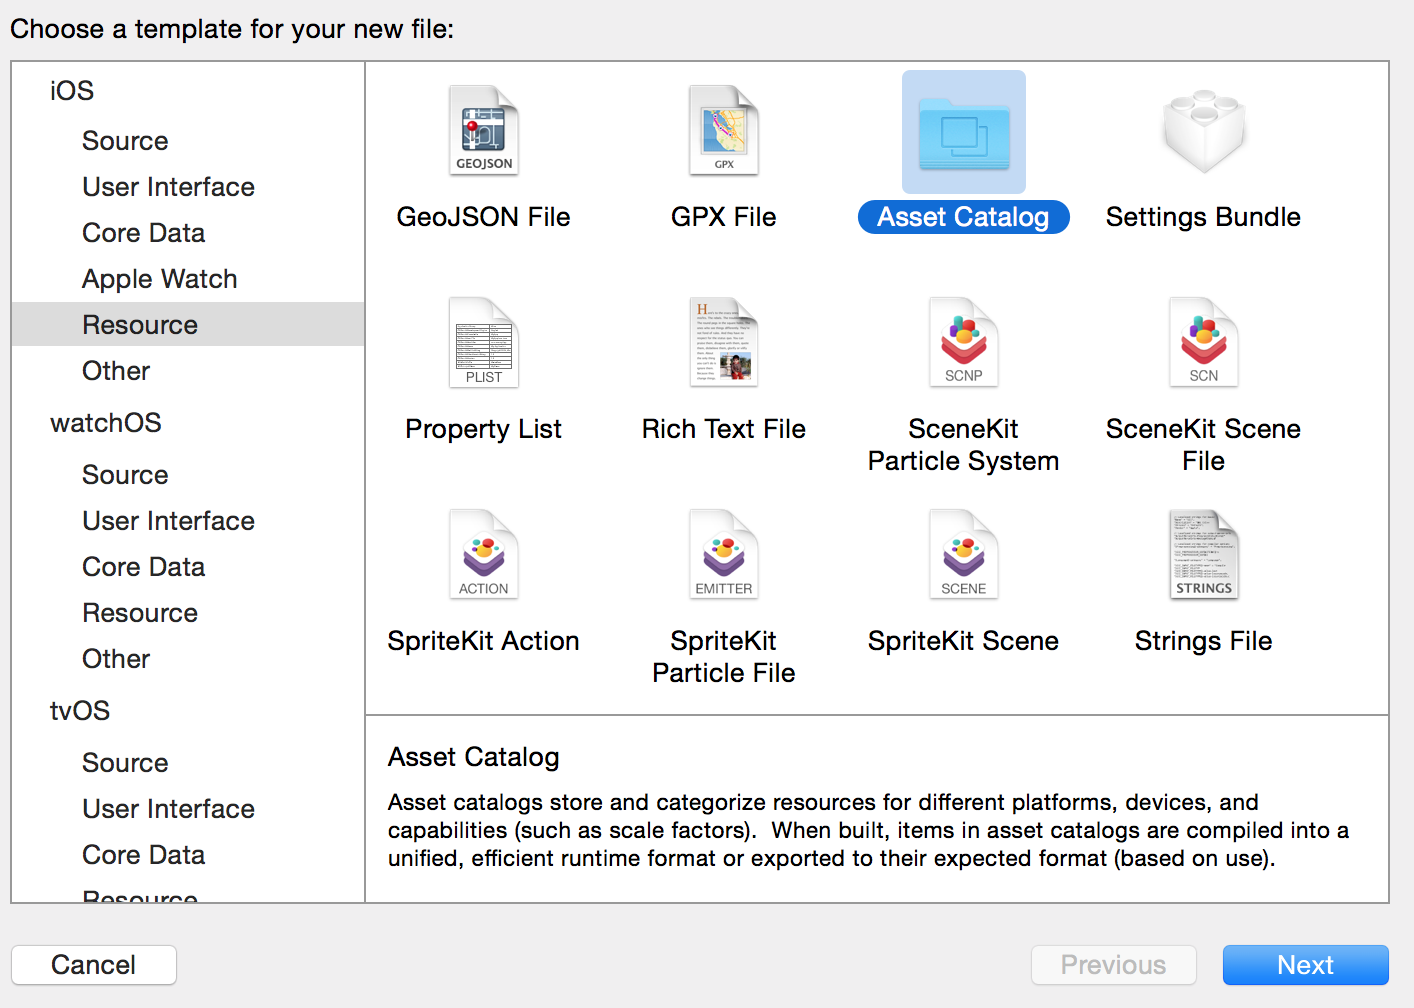
-
For the
Podfile, you can configure it like this:
platform :ios, '8.0'
use_frameworks!
# ignore all warnings from all pods
inhibit_all_warnings!

def myPods
    pod 'Masonry',  '~> 0.6.4'
    pod 'YYKit', '~> 1.0.7'
    pod 'ReactiveCocoa', '~> 2.5'
end

target 'MultipleTargetTest' do
    myPods
end

target 'Target_2' do
    myPods
end
You may see a warning like the following. The build should still succeed, but I prefer to resolve it to be safe:
[!] CocoaPods did not set the base configuration of your project because your
project already has a custom config set. In order for CocoaPods integration to
work at all, please either set the base configurations of the target
`Target_2` to `Pods/Target Support Files/Pods-Target_2/Pods-Target
_2.debug.xcconfig` or include the `Pods/Target Support Files/Pods-Target_2/
Pods-Target_2.debug.xcconfig` in your build configuration.
Someone on stackoverflow proposed a solution (apparently pod update --no-repo-update also works):
what fixed it for me was to change the configuration file setting to None for the two Pods-related targets, then run pod install again.
- Here is an example of using the
-DMULTIPLE_TARGETS_TARGET2macro in code for conditional compilation based on the active target:
#pragma mark - MULTIPLE_TARGETS_TARGET2
    //Build Setting
    //Other C Flags
    //-MULTIPLE_TARGETS_TARGET2
#ifdef MULTIPLE_TARGETS_TARGET2
    NSLog(@"MULTIPLE_TARGETS_TARGET2");
#else
    NSLog(@"MultipleTargetTest");
#endif
- If the project uses Swift and Objective-C mixed, errors may occur — most likely because the
XXX-Bridging-Header.hfile was not generated, or an existing one was not configured as the bridging header.
#ifdef MULTIPLE_TARGETS_TARGET2
#import "Target_2-Swift.h"
#else
#import "MultipleTargetTest-Swift.h"
#endif
Code:
All code from this article can be found on my GitHub: MultipleTargetTest.
References:
Thanks to my apprentice for helping organize the reference materials.